Sunday, May 25, 2014

Another trash to treasure project...

This project truly is a trash to treasure project.

We have community dumpsters scattered around town rather than home trash pick up.  In our neighborhood we have a large trash compactor around the entrance to our area.  We have found so many interesting and very nice objects over the years.
I have a large mirror that would cost a good $150 that had no chips or cracks or damage of any kind!
We have a really cool welcome bear sign and figure that's nearly 4' tall that nearly new if not brand new.  And we have a bronze sculpture lamp with bears that we later researched and is a $300+ lamp with a scene in the shade when you turn it on that also as like new!
This is just a few of the items left there that we've scored.  

We've left our fair share of things by the dumpsters too over the years and hope they've made people just as happy!

 So on to the latest find...
The other evening on the way home These caught my eye... I contemplated them as I drove on...and

You guessed it.
Had to turn around for a closer look...

And then they came home with me.

Each chair had a spot that had split on the back...nothing a little glue and clamping couldn't handle!


There's no maker listed on them, but the construction is great and the seats even had what I believe is the original fabric...
Some more glue to shore it up..

From the moment I loaded them up I had thought turquoise...

I Googled Krylon colors, found Bahama Sea.... 

sent Dave to Walmart.... And Ace....

Nope.  No Bahama Sea in our little town.   And being the impatient crafter I am, I didn't want to order paint and wait....and wait...


Then the search for fabric was on.

We have the nicest fabric store that carries a HUGE selection of all kinds of fabrics!  Designer and upholstery and quilting and.... Well you get the picture!


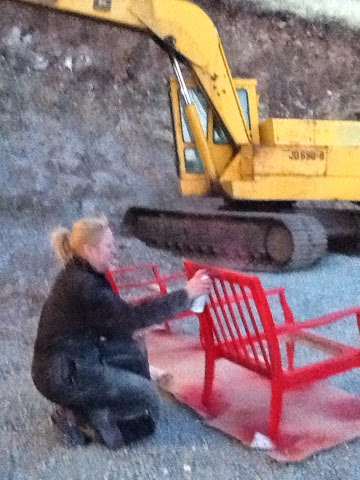
Then painting.....so many coats....

I took a Facebook poll because the fabric was reversible and the results were nearly unanimous...


And here's the result:

The paint looks washed out in the basement lights, so here's another pic with natural light...
which still doesn't do the color justice... I may post an edit later when I get the energy to haul them down stairs to take a picture outside...

So for $20 in fabric and about $22 in paint....   We have new chairs!

One more step is needed, but it will have to wait for a trip to the big city.  I plan on applying silver leaf the two flat rungs on the back....

What do you think?


Monday, April 28, 2014

Time is now for a project!

Earlier this month my friend Traci was having a courtyard sale at their restaurant.

She posted some pictures and there was this cute little pair of chairs that were....tired.
 
See them there?  Just waiting for me to come rescue them and give them new life?

So I bought them!

And today was the day to tackle the chair project!

So to start with I needed to remove at least one coat of white paint on one chair and one and a half coats on the other one.

So...me and the MegaMouse got with it...

I just love their lines.  Love the front legs and the spindle backs...
The wood is in really good shape.
They would actually be a good pair of chairs to strip all the paint off of and put a really nice dark stain on....but today they will just be painted.

Maybe in their next life...

Finally!  One done....
...now on to the second one...
I got a little dirty.
Success!   Got both chairs done and ready for paint!

Well, maybe after this shot.  Lily wanted in on the photo action.

Now to shoo her away....

Ok

I could go back with a conventional and traditional white.  After all that's the color they were when I fell in love with them...

But they really wanted to be RED.  Nice bright cherry red!

so

One coat on my fingers.


One coat on the chairs. 

Second coat going on... Thanks to the hubby for the pic!

Yep, I'm in my coveralls.  It was windy as heck earlier and off and on breezes by the evening, and we'd had some snow flurries earlier in the day.

What you can't see is that this was pajama day.... Dave was in his sweats and I still had my pajamas on under the coveralls.  I also have my house slippers on....

Hence the reason I got a day to work on my own project.   Dave spent the day watching movies on the couch taking a well deserved day off from our big house building project.

And the finished product?


Here they are.  With their so cute black and white cushions.

Cushions are from Walmart garden center!
When I first saw the chairs I thought I wanted red, but in actuality I was open to other colors too. Mainly it would depend on what cushions I could find.  I also didn't really expect to find cushions to quickly.

But these lovely black and white cushions were toward the back of our garden center and I felt like the seat cushions were just the right size.  

I know.

Should have measured.

That's just how I roll.

When I found them, I knew I had to go with red.

I even love them from their back.

You will actually see the back side of these more in my house because they are going to be in the sun room with their backs to them main living area.

My favorite throw pillow is the one below, but they only had one, so I got a stripped one to match the reversible side of the back cushions.

I think I will give them a light sanding and one final coat of paint in a day or so. 

After I buy another can.

Then clean out the sun room and start looking for a small table to go in between....

Ah, the possibilities!

Sunday, April 13, 2014

The hiatus ends soon...

I hope to be crafting and creating again soon...

This summer there will be more projects!
There has to be!
My Pinterest is filling up with things I need to do!

LOL

In the mean time check out our house building project on our other blog which is what's had my attention for sometime:

http://2steppsabove.blogspot.com

See you soon!

Sunday, November 13, 2011

DIY recessed shelving - Part II

It's all done but the trim work, which will have to be Part III of this post... 
Have a lunch date with my dad first...

Here's the progress so far:
 Lay it out and mark for the 1/8" birch plywood backing

 Cut using a jig saw

 I chose a natural stain finish for a contrast, but you could paint it a matching or contrast color or even wall paper it at this point


 The MDF I used came prepainted with a matte finish, but it was marked up so I gave it a quick coat of glossy white

 Here are the two ready for glue and nails


 Ready to be installed


Here's the dry fit - just some shims to keep it centered and plumb and it'll be ready to nail into place flush with the dry wall.  Then the trim will come later.....

Saturday, November 12, 2011

DIY recessed shelving - Part I

Here's a little project I am doing in the 3rd bedroom.  There's a little area between the closet door and the corner of the wall where it was just perfect for a little recessed shelving unit....
The measurements are 16"x34" with 3 fixed shelves.
Had to block out the framing to make it fit where I wanted it to between the studs, but it's coming along nicely.
Cut the hole

Frame out the top, bottom and sides - glue and nail for stability

 Add shelves - glued and nailed
Shelf is ready for the backing and to be installed...  did a dry fit tonight with out the backing, but had to go to dinner with friends...

So, the rest will be the Part II blog post tomorrow ...

Tuesday, May 31, 2011

Slogger... or is it Flogger...

I am either a Slacker-Blogger or a Failed-Blogger!
Either way.  The end of this spring semester seems to have gotten the best of me!

I failed in my 365 challenge to myself and I have fallen down on the blogging.
It is certainly not because I haven't had anything to blog about.  Au Contraire!!
I have had PLENTY.  Just no time or energy to blog.  I even have on the go blogging with my Andriod app and the iPad, yet here I am.  Blogging now after school is vurtually done.

I say virtually because the kids are out of school, but I still have a couple days and a workshop in Fredericksburg...I can't wait!!

Then for June it's projects around the Mimosa house... and July will be all about family reunions and projects at the Sherwood Loop house...
then a weekend with the sisterchicks in Ruidoso the first weekend of August and then... oh dreaded then... it's practically back to work!  School starts the 22nd of August! YIKES!

Ok, I have to stop talking about it now. I feel as if my whole summer has just passed.

Friday, March 25, 2011

C365:19


The sun setting while we were walking the Eagle Run Trail, AKA the dam walk....

blogged on the go from my android phone