It's all done but the trim work, which will have to be Part III of this post...
Have a lunch date with my dad first...
Here's the progress so far:
Lay it out and mark for the 1/8" birch plywood backing
Cut using a jig saw
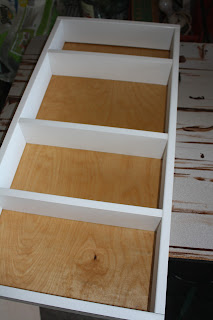
I chose a natural stain finish for a contrast, but you could paint it a matching or contrast color or even wall paper it at this point
The MDF I used came prepainted with a matte finish, but it was marked up so I gave it a quick coat of glossy white
Here are the two ready for glue and nails
Ready to be installed
Here's the dry fit - just some shims to keep it centered and plumb and it'll be ready to nail into place flush with the dry wall. Then the trim will come later.....
a blog about 7 facets of my creativity: ● sewing ● scrapbooking ● jewelry ● photography ● cooking ● stained glass ● creating ●
Sunday, November 13, 2011
Saturday, November 12, 2011
DIY recessed shelving - Part I
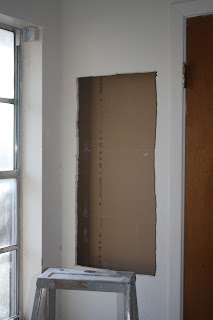
Here's a little project I am doing in the 3rd bedroom. There's a little area between the closet door and the corner of the wall where it was just perfect for a little recessed shelving unit....
The measurements are 16"x34" with 3 fixed shelves.
Had to block out the framing to make it fit where I wanted it to between the studs, but it's coming along nicely.
Cut the hole
Frame out the top, bottom and sides - glue and nail for stability
Add shelves - glued and nailed
Shelf is ready for the backing and to be installed... did a dry fit tonight with out the backing, but had to go to dinner with friends...
So, the rest will be the Part II blog post tomorrow ...
Subscribe to:
Comments (Atom)


